Test the sponge – it should have a honey-gold brown and domed
top crust (internal 98°C/208°F). I bake this cake further than others
because if it will be soaked, you NEVER EVER have to worry about an
overcooked/dry sponge.
Undercooked sponge means a gluey texture that won’t absorb the bucket
of milky moisture.
Remove the sponge from the oven. Place the tin on a wire rack to cool
for 5 minutes, then gently run a knife around the edges. Flip out, then
re-invert to top-side up and cool for another 10–15 minutes.
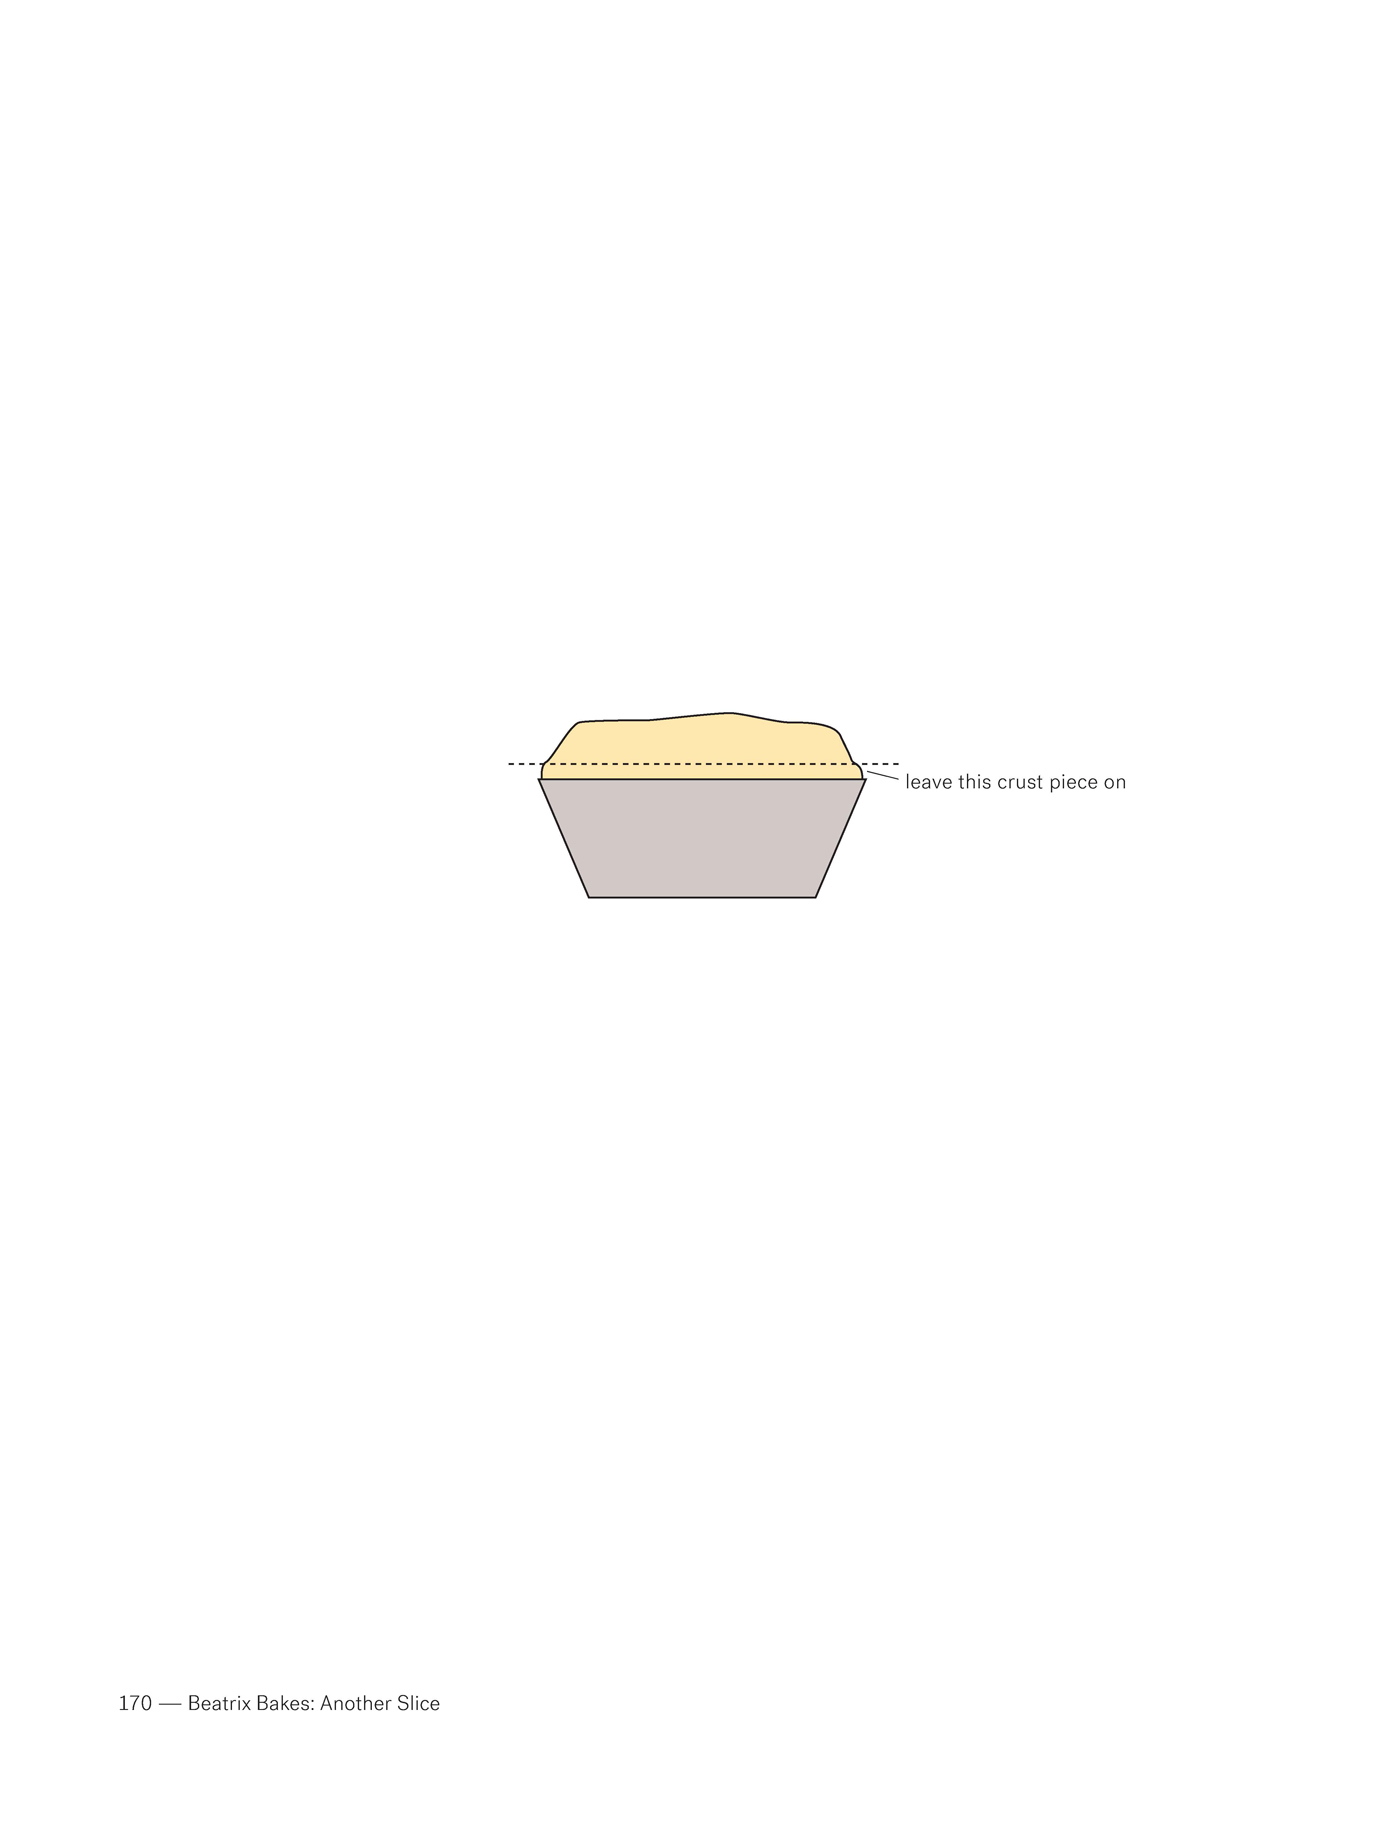
Place the cake on its side and gently shave the top crust off in one
confident slice with a sharp serrated knife. You want to expose the
internal crumb but leave a little 2 mm ( 1⁄16 in) border of top crust at
the loaf edges. Aim your knife just above the line where the side crust
meets the top crust.
Lay out a long double layer of plastic wrap on your counter. Push the
plastic wrap into the tin to sit as snugly as possible while maintaining
generous overhang on all sides.
With a ladle or small cup measure, pour ½ cup of the soak into the base
of the lined tin and place the sponge in. Then start pouring the milk
into the cake top sooo slowly and evenly (pretend you are moving in
slo-mo) all over the cake, allowing it to sink into the exposed sponge.
Let a little cascade down the crust sides, holding the plastic wrap
overhang up and taut to act like a dam, preventing the soak from
splashing off the sponge to the outside of the tin. At each short end,
tilt the tin towards you so the milk soaks right into the end against the
crust. It’s gonna feel like a lot of soak, but trust me, it’s a thirsty cake
… and it wants the juice!
If the soak isn’t saturating in fast enough (soak too thick), add a few
tablespoons of fresh milk to loosen it up. Also, you can encourage sponge
saturation by making deep incisions with a small, sharp knife. Keep the
incisions prised open while pouring the soak in.
leave this crust piece on